Grab a Tripod
& skip the boring selfie.
Just about anything can be used as a prop to enhance your self portraits. Household items, like a set of sheets, or dollar store items, like markers, and a simple backdrop, like a plain white wall, is all you really need.
Here are 12 simple ideas with items you may already have. You will need a tripod for all of them and preferably a camera with a self timer or hand held shutter button/app, but a camera phone with a self timer will do!

1. It’s a Wrap
Items needed: Left over wrapping paper and some tape.
How it’s done: For this photo, I taped some wrapping paper to the edge of a counter and sat under the counter looking out towards the camera. I had a little spray paint left on my hands from earlier in the day so that part was just a happy accident and enhanced in editing.
Time involved: Less than 10 minutes. The perfect rip may not happen on the first try.

2. Spilt Milk
Items needed: A kiddie pool filled with water and a gallon or two of milk.
How it’s done: I recommend picking a warm day for this idea. Fill a kiddie pool with enough water to cover some or all of your face and add a gallon or two of milk. I went will a gallon and a half before the water started looking white enough. The camera should be set up at a downward angle on the tripod.
Time involved: How ever long it takes to fill a kiddie pool.

3. Steam Clean
Items needed: Clear glass and a way to create a haze such as a steamy shower or a foggy car window.
How it’s done: Face the camera outside of the shower looking in. Let the hot water run until the glass becomes steamy looking. You can either leave the shower running or turn it off when you jump in to take the photos. If you turn it off, you’ll have to start over once the steam dissipates if you didn’t get a picture you are happy with.
Time involved: Usually just a minute or so to steam up a shower with the door closed.

4. Balancing Act
Items needed: Flowers and acrylic or glass such as a shower, window or even an acrylic desk
How it’s done: Place the glass between you and the camera and the flowers between you and the glass.
Time involved: This one actually took me longer than expected since I was trying to balance the flowers between my face and the glass while standing in the shower. Next time, I’d opt for placing the camera under a clear table looking up towards the ceiling, laying the flowers on the table and peering down towards the camera.

5. A Walk to Remember
Items needed: A bouquet.
How it’s done: Pick a secluded spot on the beach if you are shy! Walk around within the camera frame testing out different poses. On a really windy day a tripod weight, like this, may come in handy.
Time involved: Possibly a long walk on the beach and less than 5 minutes of shooting.
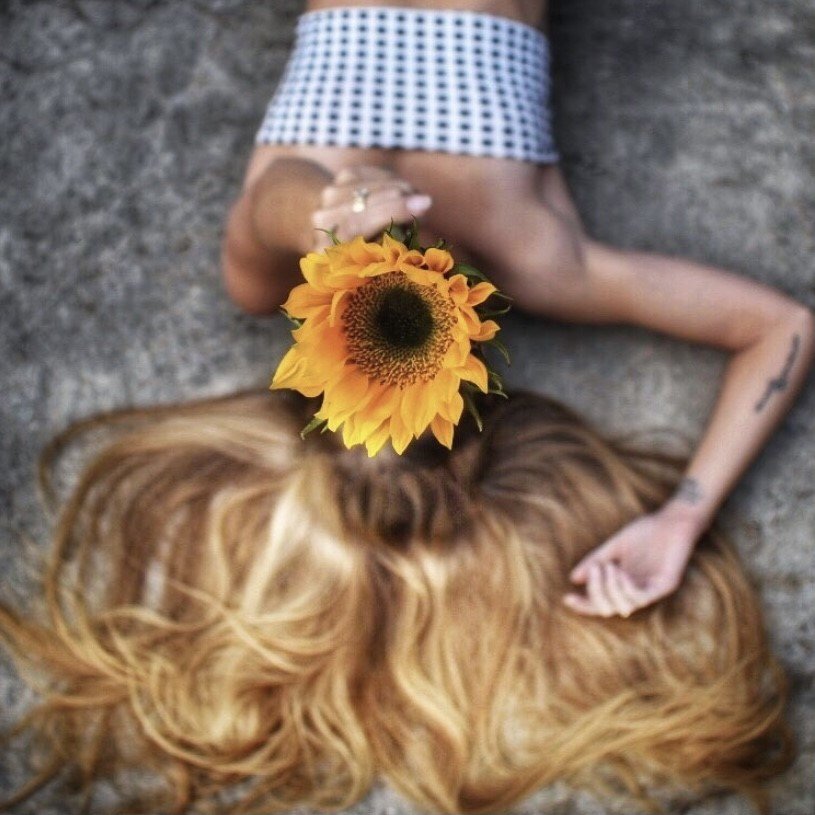
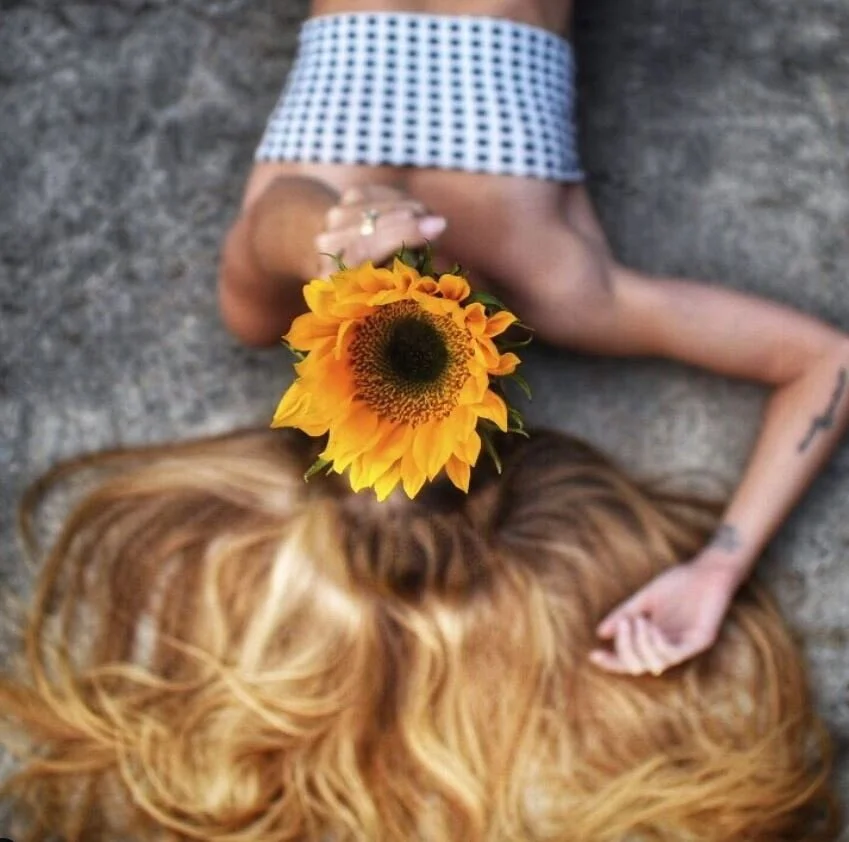
6. In Focus
Items needed: I’m guessing you’ve caught on that I like using flowers, huh? They are pretty and cheap, what can I say? Really this photo could be done with just about any item in your hand and stretched away from the rest of your body.
How it’s done: Angle your camera toward the ground, lay down and spread out your goldilocks hair. It definitely pays to have a real camera instead of a phone if you want a really nice blurred background.
Time involved: Less than 5 minutes.

7. Hats Off
Items involved: A hat.
How it’s done: There are so many different portraits you can do using a hat as a prop. I just decided to sit in front of a garage door, but for more inspiration search for ‘Hat Portrait Photography’ on Pinterest. One I haven’t tried yet is throwing the hat towards the camera. A tip if you do this, don’t pick a heavier hat with a flimsier tripod. You may not like the outcome if you’ve got a pitcher’s throw.
Time involved: Less than 5 minutes.
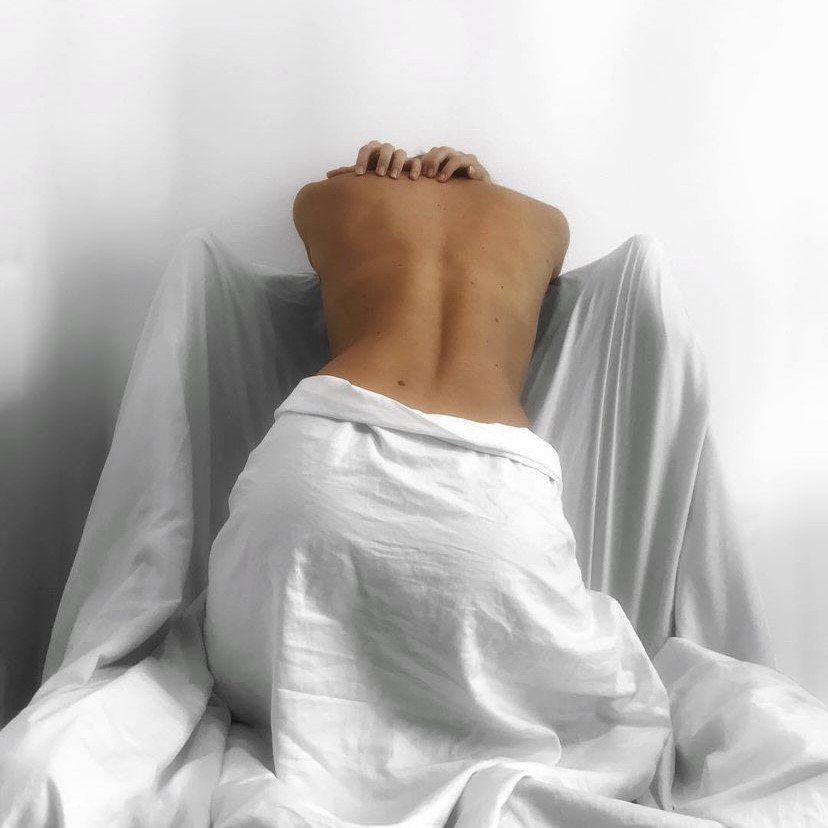
8. Oh, Sheet!
Items needed: A chair (I used a wingback because I wanted something of a decent size, but a dining chair can work) and two sets of sheets.
How it’s done: Place a covered chair in front of a blank wall, a mural, or even a forest. Search ‘chair poses’ on Pinterest and drape some sheets over yourself. I used a phone on a tripod for this picture since I wasn’t worried about aperture and used the app Photo Timer+.
Time involved: Less than 5 minutes.

9. Blank Stares
Items needed: A piece of glass or acrylic and some paint.
How it’s done: I used my fingers to make a couple swipes of paint across a window I picked up at a Habitat ReStore for $2.50. The pane of glass will be positioned between you and the camera so before you make any paint swipes, make sure it lines up correctly so you don’t have to hunch or hold the pane too high to get the paint to line up in front of your eyes.
Time involved: Less than 10 minutes

10. X Mark(er)s the Spot
Items needed: A marker.
How it’s done: Pick something to write on your skin. I chose to write only on my hand since I only had a permanent marker available, but you could go crazy and mark up your whole body. I love using hands in photos so don’t forget your body can be the "‘prop’ as well! I have also done a similar picture using paint instead of marker and putting handprints all over myself.
Time involved: Less than 5 minutes.
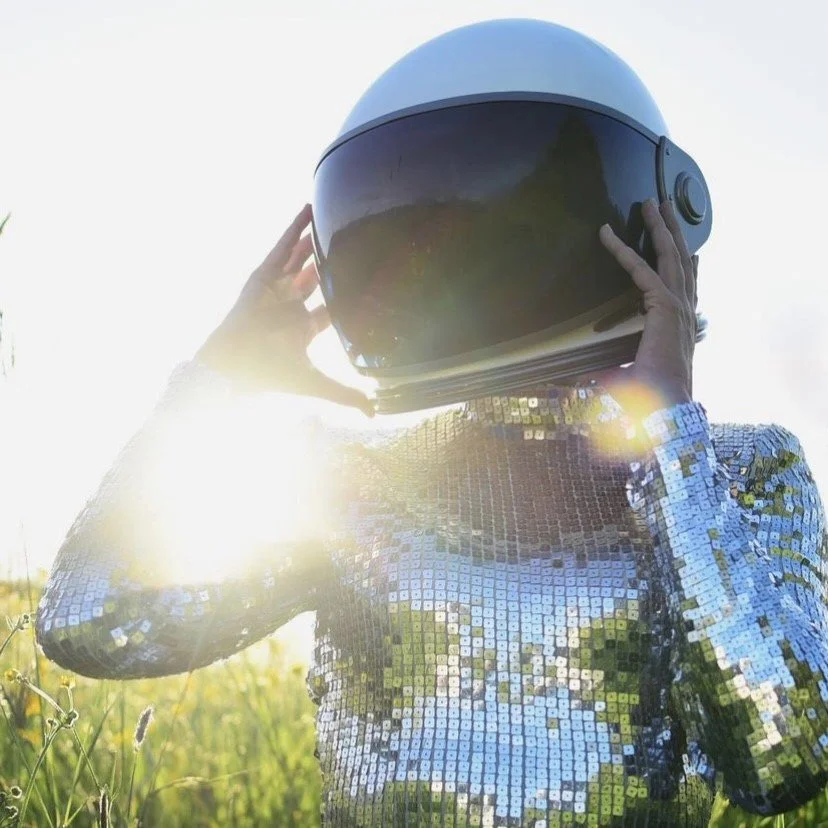
11. Spaced Out
Items needed: An astronaut helmet.
How it’s done: I did this photoshoot in a field of wildflowers, but really once you add a prop as cool as an astronaut helmet the more bizarre the location the better. And if you are going to get an astronaut helmet you should probably get a cool outfit to go with it. A spacesuit works, or a mirrored dress?!
Time involved: About 10 minutes since I did a series of these photos, but I’m sure it could be done in less than 5.

12. Jewel Intentions
Items needed: Dollar store stick-on gems.
How it’s done: I’ve done this idea a couple times. The first, pictured here, I focused on the face and some of my hand. Another time, I put stick on pearls all over my legs and did some photos in some metallic booties.
Time involved: It took about 20 minutes to stick the gems on, but I’m sure you can do it faster if you’re in more of a rush.

